User Defined Fields within OHS
When you create User Defined Fields (UDFs) in OHS, it is possible to display these on the Details tab of each applicable window (e.g. Plant & Equipment or Hazards) instead of the User Defined Fields tab. Note that this applies to OHS only; the UDF will not appear on the Details tabs in any other module (including HR3people).
To display UDFs on the Details tab
- Create the UDF as usual (see User Defined Fields (UDFs)) and click Save UDF.
- Click Finish to exit the UDF Designer.
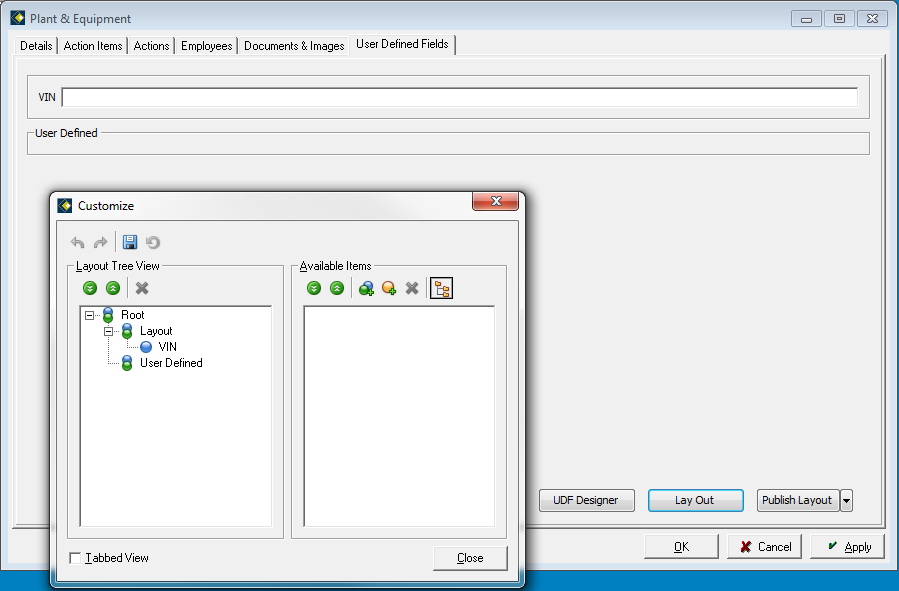
- Click Lay Out to open the Layout editor.
This window is described further in The Customize UDF Layout Window.
Each level of the Layout Tree represents an area of the UDF window.
For example, if you select VIN in the tree, it will highlight the VIN field:
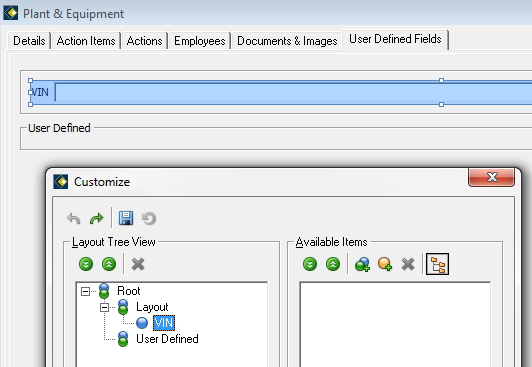
- You may find it helpful to move this Layout editor window to the side of the main window, so you can see both windows clearly:
- Your aim is to move the new User Defined field (in this case 'VIN') to the area labeled User Defined. To do this, follow steps a, b, and c:
- In the User Defined Field window, click directly on the new field (e.g. VIN) to highlight it.
- Drag this field over the User Defined area of the window.
As you move your mouse around, the UDF will be moved around this window and different areas will be highlighted. You need to look out for the bold border within the highlighted section - this indicates where it will place the UDF when you release the mouse button. - Release the mouse button when the bold horizontal line appears in the centre of the blank User Defined area, as in this example:
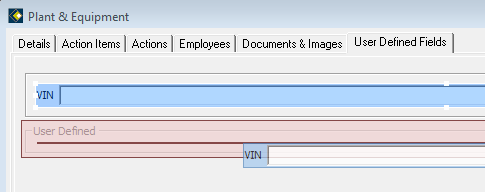
TIP: the horizontal line will appear in the centre when the UDF is hovered at around the same point as this example, i.e. at least a third of the field size in from the left.
This will result in the UDF being placed in the User Defined area.
- Click Close on the Layout editor (Customize) window, then click OK to close the UDF Designer window.
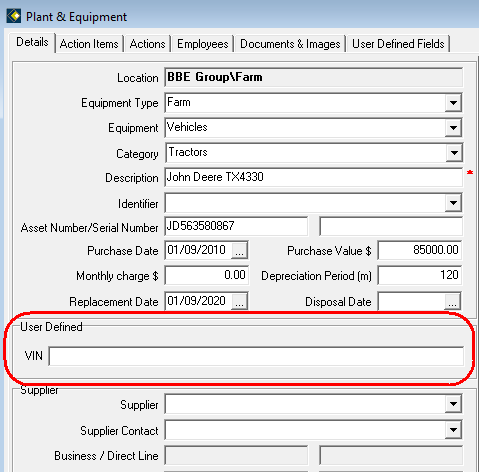
- Open a record in the same category (in our example, Plant & Equipment). The new UDF will be displayed in the Details window:
The Customize UDF Layout Window
You may choose to customize the UDF layout further – this is particularly relevant if you have multiple UDFs – and this is done using the Customize window.
The Customize window is divided into a right and left panel. Generally you would only use the left hand panel, but in the right hand panel you can choose items from the Available Items menu and then drag these to the left hand panel. Also if you have UDFs that you do not wish to display in either the Details or User Defined Fields tabs, you can ‘hide’ the UDFs by dragging them from the left to the right hand panel.
In the Customize window, these options are available to you:

| Button | Explanation |
|---|---|

|
Expand All / Collapse All: If you have a ‘tree’ of items displayed, with a plus or minus button to the left, use these buttons to open all branches of the tree (expand) or to close them so only the top level is displayed (collapse). |

|
Add Group: Use this option if you want to create a ‘tree’. This button creates an empty group within which you can add UDFs, perhaps with a common theme. |
|
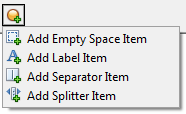
Add Auxiliary Items: If you have multiple UDFs (and Groups) you can add these items to separate them or to label them. Select the relevant item to add it into the right hand panel, then drag the item to the left hand panel in the appropriate location. |

|
Delete: If there are Auxiliary Items or new Groups you can highlight and delete these. You cannot use this to delete UDFs. |

|
View as Tree / Plain List The ‘View as’ option changes the item display on the right between a ‘tree’ with branches displayed, and a simple list of items only. |
Back to Introduction to OHS


